Gallery Wall Layout Ideas: How to Plan, Arrange, and Hang Art Like a Pro
Affiliate Disclosure: DecorDesignIdeas.com is a participant in the Amazon Services LLC Associates Program, an affiliate advertising program designed to provide a means for sites to earn advertising fees by advertising and linking to Amazon.com.
As an Amazon Associate, we earn from qualifying purchases. This comes at no extra cost to you.
A gallery wall looks effortless when done well and like a yard sale when done poorly. The difference is not the art. It is the layout, the spacing, and the frames. Most people skip the planning step, start hammering nails, and end up with a scattered arrangement that never quite looks right.
DecorDesignIdeas Editorial treats the hang as paper-template first. We compare The Spruce’s paper-cutout method, Apartment Therapy’s 57-inch on-center note for a group treated as one picture, and the leftover above the sofa after you tape the cluster. This desk does not hang art for a living, and we do not cite a fake ASID “always use nine frames” survey.
This is the planning-and-pattern version. The renter-safe, no-nail hang with adhesive strips stays on no-nail gallery wall. A long wall that should not become a horizon line of identical frames is in how to decorate a long narrow room. Frames that should lean on a knee wall, not hang on a pitch, are in how to decorate a room with slanted ceilings. A tight cluster beside a chair is in cozy reading nook design ideas. The camera-wall version is in home office decor ideas.
Listing check: frame-set and picture-ledge links below are tagged Amazon searches we use to compare listed outside dimensions. We are not copying Amazon “gallery wall in 10 minutes” copy. Tape the paper before you order.
Before you tape the paper
Decide the job of the wall. Then pick a pattern. Do not reverse that.
- Name the furniture under it. Sofa, console, headboard, or none. The Spruce’s hang note: above furniture, relate the bottom of the grouping to the piece, not to a museum midline you cannot see from the seat.
- Pick grid or salon out loud. Same-size grid is math. Mixed salon is balance. Mixing both on one wall is two projects.
- Tape paper at the real height. Apartment Therapy’s 57-inch on-center note treats the whole cluster as one picture. Above a sofa, the lowest frame still wants about 6 to 8 inches of air. If those two fight, the sofa rule wins.
- Measure the furniture width first. 60 to 75 percent of the sofa or console is a shop filter, not a measurement we took on your wall. Paper that looks like a postage stamp from the door is too small.
- Unify the frames before you buy more prints. One color, one material, or a deliberate two-color split. Random thrift finishes without paint look like an afterthought.
When to skip a gallery-wall layout
| Move | Do it when | Skip it when |
|---|---|---|
| Symmetrical grid | You have matching frames and a level you will actually use | Mixed sizes forced into a grid with uneven gaps |
| Salon cluster | You will tape paper and live with it for a day | Hammering the first nail from a phone photo |
| Horizontal line above a sofa | The total width stays inside about two-thirds of the sofa | A row that runs past both arms and turns into a horizon |
| Staircase diagonal | Each center tracks the tread line and spacing stays 2–3 inches | Frames that climb, then drift, then look drunk |
| Picture ledge lean | You want two or three holes and a wall you rearrange | A rental that still forbids even those; use the no-nail gallery |
| 60/30/10 content mix | You can name photos vs prints vs objects without a pie chart | A ratio this desk cannot defend; if it looks like a photo dump, pull objects or pull prints |
The measured, six-frame renter version stays on no-nail gallery wall.
Before you start: decide on a style
Gallery walls fall into two broad categories. Pick one before selecting frames or art.
Structured grid
All frames are the same size, arranged in a precise grid with equal spacing. This looks clean, modern, and architectural. It works best with a cohesive set of images: black-and-white photos, botanical prints, or a series of related illustrations.
Best for: Modern and minimalist rooms, hallways, staircase walls.
Organic salon style
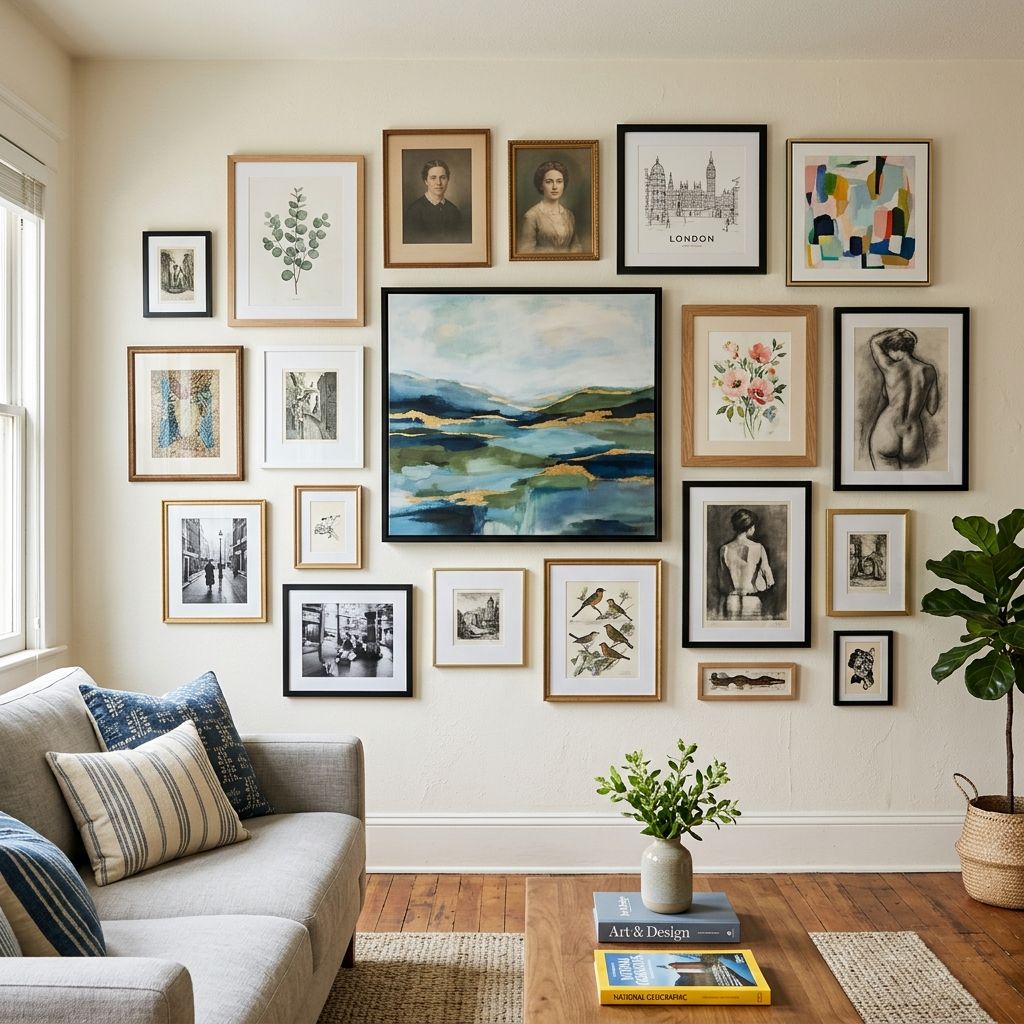
Mixed frame sizes arranged in a loose, balanced cluster. This is the more common gallery wall style and works with a variety of art, photos, and objects. It looks collected and personal, but getting the balance right takes more planning.
Best for: Living rooms, bedrooms, eclectic and bohemian spaces.
7 gallery wall layouts that work
1. The symmetrical grid
Identical frames in a 2x3, 3x3, or 3x4 grid. Keep spacing between frames at exactly 2 to 2.5 inches. Use a level and measuring tape for every frame. This layout is the most foolproof because it follows simple math.
Frame recommendation: Matching black or white frames in 11x14 or 16x20 create the strongest grid. A matching set simplifies the process only if the listed outside dimensions match the paper you already taped.
Browse matching 11x14 gallery frames and check listed outside size, not the collage thumbnail.
2. The horizontal line
Three to five frames hung in a single horizontal row, centered at 57 inches from the floor (standard gallery hanging height). Mix frame sizes slightly (one large flanked by medium on each side) or keep them uniform. This works above a sofa, a console table, or along a hallway.
Spacing: 2 to 3 inches between frames. The total width of the arrangement should be roughly two-thirds the width of the furniture below it.
3. The centered cluster
Start with the largest piece in the center and arrange smaller pieces around it. The overall shape of the grouping should form a rough rectangle, oval, or diamond. This is the most popular salon-style layout and the most forgiving because asymmetry is part of the design.
4. The staircase diagonal
Frames follow the diagonal line of a staircase wall, with the center of each frame at the same height relative to the stair treads. Maintain 2 to 3 inches of vertical spacing and stagger frame sizes for visual interest.
5. The single column
A vertical stack of frames works in narrow spaces: between two windows, beside a doorway, or in a tight hallway. Use three to five frames of the same width but varying heights for the best proportions.
6. The above-sofa arrangement
One of the most common gallery wall locations. The bottom of the lowest frame should sit 6 to 8 inches above the sofa back. The arrangement should not extend beyond the edges of the sofa. Keep it within 60 to 75 percent of the sofa’s width.
For more living room wall ideas, see our guide on budget wall decor ideas.
7. The shelf gallery
Instead of hanging frames directly on the wall, mount one or two picture ledges and lean frames on them. This creates a gallery wall effect that is easy to rearrange and requires only two or three nail holes total. A picture ledge in white or natural wood holds multiple frames at once.
Browse picture ledge shelves and check listed length against the furniture width below.
Spacing and sizing rules
Professional designers follow these guidelines. They are not arbitrary. They are based on how the eye perceives grouping and separation.
| Rule | Guideline |
|---|---|
| Space between frames | 2 to 3 inches (uniform throughout the arrangement) |
| Center of arrangement height | 57 inches from the floor (eye level) |
| Distance above furniture | 6 to 8 inches above the top of the sofa, console, or headboard |
| Arrangement width | 60 to 75% of the furniture width below it |
| Minimum number of pieces | 3 (fewer than three rarely reads as a gallery wall) |
The most common mistake: Spacing frames too far apart. When frames are 6 or more inches apart, they stop reading as a group and look like individual pieces scattered on the wall. Keep frames close enough that they feel connected.
Choosing frames
Frame selection matters more than most people realize. The frames create the visual structure that holds the whole arrangement together.
Matching frames
All frames the same color, material, and profile. This is the safest choice and works with any layout style. Black frames on a white wall is timeless. White frames on a colored wall creates a softer look.
Mixed frames with a unifying element
Different frame styles that share one consistent element: all the same color (all black, all gold, all natural wood) but different sizes and profiles. This gives the arrangement variety without chaos.
Mixing frame colors
This is the hardest to pull off. Limit yourself to two frame colors (black and gold, white and natural wood) and distribute them evenly across the arrangement so no single area is dominated by one color.
Material note: Real wood and metal frames look substantially better than plastic. Thrift stores and estate sales are the best sources for affordable real-wood frames. A can of spray paint unifies mismatched finds.
Art and content mix
A gallery wall does not need to be all art or all photos. The most interesting gallery walls mix content types:
- Photography (personal and fine art prints)
- Illustrations or prints (botanical, architectural, abstract)
- Text-based art (a meaningful quote, a page from a book, a typographic print)
- Objects (a small mirror, a decorative plate, a woven basket, a small shelf with a plant)
Content mix: A 60/30/10 split (photos / prints / objects) is a blog habit, not a count this desk can defend. Name the majority. If the wall looks like a photo dump, add one object or pull three prints. If it looks like a gift shop, pull the objects.
Budget art sources:
- Free printable art from museum archives (the Met, Smithsonian, and Rijksmuseum all offer high-resolution downloads)
- Local print shops ($5 to $15 per print)
- Fabric or wallpaper samples framed as abstract art
- Pages from old books or maps
- Your own photos printed at a lab, not on a home printer (the quality difference is significant)
How to hang a gallery wall: step by step
This process prevents unnecessary holes and alignment mistakes.
-
Lay it out on the floor first. Arrange all frames on the floor until you find a layout you like. Take a photo from directly above.
-
Trace each frame on kraft paper or newspaper. Cut out the shape of each frame and mark where the hanging hardware sits on the back.
-
Tape the paper cutouts to the wall. Use painter’s tape to arrange the paper shapes on the wall in your chosen layout. Step back and adjust until the arrangement looks right. This step lets you test the layout without making any holes. If you want the same planning method with adhesive strips instead of nails, use our no-nail gallery wall walkthrough.
-
Mark the nail positions through the paper. Once the paper arrangement is final, mark each nail position through the paper directly onto the wall.
-
Remove the paper and hammer nails. Hang each frame and make micro-adjustments.
Tools you need: A level, a tape measure, painter’s tape, kraft paper, a pencil, a hammer, and appropriate wall hardware (picture hooks for plaster, drywall anchors for heavy frames).
For more wall styling ideas, check our guide on dining room wall decor ideas.
Gallery wall mistakes to avoid
Hanging too high. The center of your arrangement should be at eye level (57 inches), not at the top of the wall. Art hung too high disconnects from the furniture and the people in the room.
Making it too small for the wall. A tiny cluster on a large wall looks lost. About 50 to 75 percent of the available wall is a shop filter, not a measurement we took on your plaster. Tape paper and stand in the door.
Desk note: If you have to crane from the sofa, the cluster is too high. Seated sightline beats a museum midline when furniture is under the wall.
All the same size frames. Even in a grid layout, a wall of identical 8x10 frames can feel monotonous. Vary the size slightly or break a grid with one larger anchor piece.
Ignoring the rest of the room. A gallery wall should connect visually to the furniture, rug, and other decor in the room. Pull colors from the art into throw pillows, or echo a frame material in a lamp or side table.
Bottom line
A gallery wall is one of the most personal design elements in a home. The planning process takes longer than the actual hanging, and that is by design. Lay it out on the floor, test it on the wall with paper, and only then commit to nails. Match your frames (or unify them with paint), keep spacing tight and consistent, and center the arrangement at eye level above the furniture below. Follow those rules and the wall will look like a designer planned it.
Frequently Asked Questions
How many frames do I need for a gallery wall?
At minimum, three. Most gallery walls use five to nine pieces for a living room wall and three to five for a smaller space like a hallway. There is no true maximum, but the arrangement should feel balanced and not extend beyond about 75 percent of the wall width.
What is the best spacing between gallery wall frames?
Two to three inches between frames, kept consistent throughout the arrangement. This spacing is close enough that the frames read as a cohesive group but far enough apart that each piece is distinct. Wider spacing (4+ inches) makes individual pieces look unrelated.
Should gallery wall frames all match?
They do not have to, but they need a cohesive element. All the same color, all the same material, or a deliberate two-color combination. Completely random frames in different colors and finishes usually look like an afterthought. When in doubt, matching frames are the safer choice.
How do I hang a gallery wall without damaging the walls?
Use Command picture hanging strips for lighter frames (under 5 pounds each). For heavier pieces, use small picture hooks that leave minimal holes. The kraft paper template method described above minimizes trial-and-error nail holes. For rental apartments, leaning frames on picture ledge shelves avoids wall damage entirely, and our no-nail gallery wall with command strips covers the measured, six-frame version.
What size art works best above a sofa?
A single large piece should be roughly two-thirds the width of the sofa. For a gallery wall arrangement, the total grouping should fall within 60 to 75 percent of the sofa width, with the bottom frame sitting 6 to 8 inches above the sofa back. \n
Video guide
Watch this helpful tutorial for a visual walkthrough:
Video by The Local Project on YouTube.
Related guides
- How to decorate a long narrow room
- How to decorate a room with slanted ceilings
- Cozy reading nook design ideas
- Home office decor ideas
- No-nail gallery wall with command strips
- Dining room wall decor ideas
- Budget wall decor ideas
- Gallery wall calculator
Sources
- Paper templates and 57-to-60-inch hang height: The Spruce, How High to Hang Pictures
- 57-inch on-center for a group treated as one picture: Apartment Therapy, How High to Hang a Picture
- Public-domain prints: The Metropolitan Museum of Art, Open Access
- Renter-safe sibling on this site: No-nail gallery wall